Wednesday, 22 May 2013
Final Result.
After I had finished the trailer and had organized everything for hand in, I went over everything and decided to make sure nothing had silly mistakes like spelling errors, punctuation mistakes etc as well as as looking over the final trailer to look at the mistakes, and see if there was anything I could fix before I had to hand in, there was some masking that I had to fix in the trailer for the eye although when looking at it I'm not too sure if it would make much of a difference although my biggest concern was the last scene as the masking took away the effect of the camera panning to the character. In short I think the overall piece went well I would have also hoped to do a lot better with my model sheet, I intended to give it a lot more of a professional look and then have it printed, however due to time contraints It wasn't possible. I did learn a lot from the whole process and has got me motivated to do more once my time at university is over, which is the main achievement I am proud of however I am still proud of the fact I was able to get the trailer completed and I was able to stick to the original Idea even though I resorted to my contingency plan, and I had made a few adjustments to my original Idea. I have seen my mistakes and I have seen the things I think I did well which is what matters, even though I wish I did have more time to correct the mistake, I really did genuinely have fun with this project!!! :D
Outro
The Outro was an interesting process because I started in photoshop with a basic grunge texture and then eventually transferred it to After Effects.

I added this grunge texture into photoshop and applied my text over it I didn't want two slides so I just added all my information into one picture.

I added vignette in after effects to give it more of a darker effect. I turned the layer into a 3D layer so I could mess with it a bit more as well as add CC glass with edited attributes to give it a more bumped look. I added a light source and animated it to give it some more effect. I think the over all look matched the whole project and it was exactly what I was looking for!
Tuesday, 21 May 2013
Restart
during the process my file went corrupt which was a huge blow as it meant I had to start the editing process all over again. it was time constraining however it didn't seem to cause too much trouble as I had all ready been through the process of putting everything together my main concern was would my laptop be able to keep up with pace I would work at as my laptop is on the verge of breaking down. I somewhat enjoyed the process of doing it again because I found it much easier however it did annoy me that I the file went corrupt!


Fading

Effects on the War Clip!

For The effects on the war clip I decided to give it an old school effect I first decided to add a mask to shave of the corners, I then added a very light orange tint to give it an old film effect, I added a black solid on top of this layer and added a noise effect and then played with the settings to get the scratch marls to give that projected look. I think Overall I did a good job wit the effects I feather'd the mask so it wouldn't be so sharp around the character, it was an easy process as there wasn't too much I had to do to get the effect.
Masking
I had to mask certain areas of the second and the last scene, there were areas that were cut out in the render, but I didn't think it was a good Idea so I thought it was better to mask it out.


 This last mask was so I could include the war clip into the scene, i didn't want it to cover the character as it was the focal point of the scene. throughout out the whole process I found it quite time consuming but I think it was a process that I had to go through. I think I achieved the look I was going for!

This is the second scene that I had to mask I decided to duplicate the scene (ctrl + D) as I tried to mask it seemed it was working so I tried a different method I thought I would try to expand the scene until you couldn't see the areas with the errors.

With this scene I Used shapes and key frames to cover up the areas that were cut out from the render it was a time consuming process, it included lots of Keyframes!!!

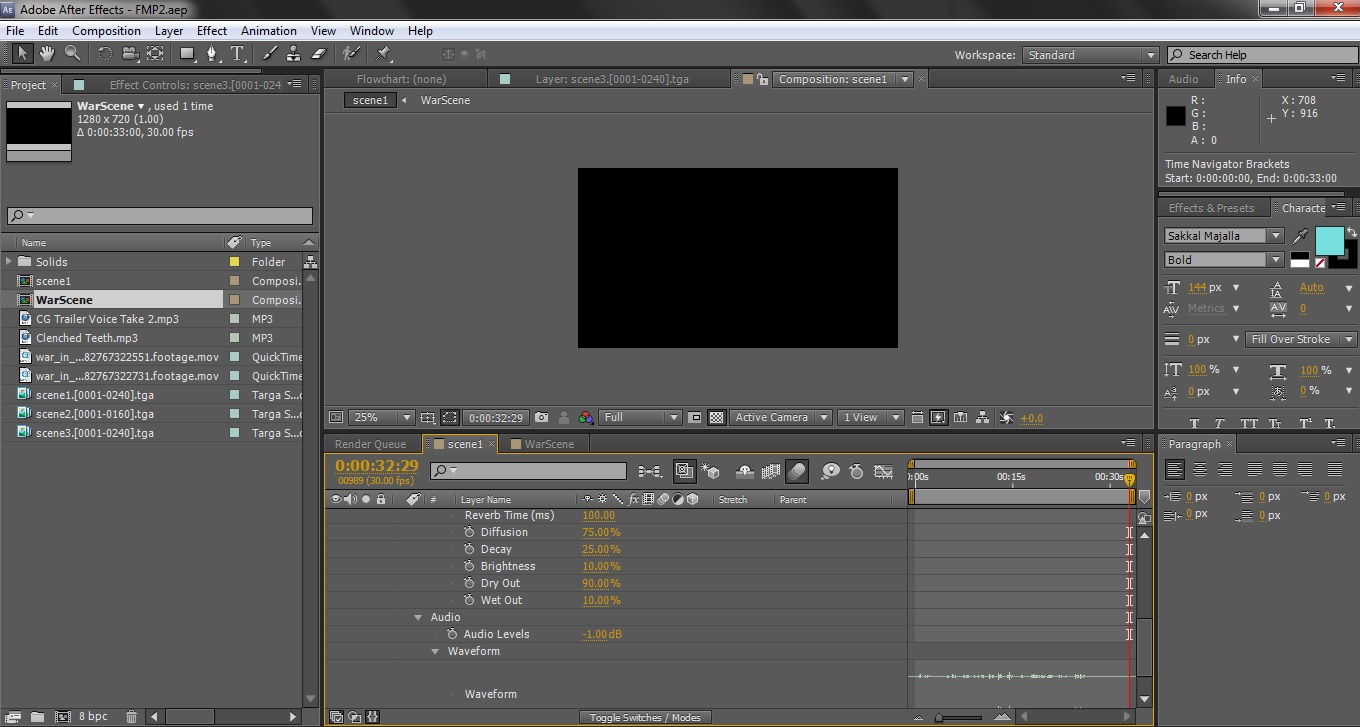
Effects on the Voice Overs
As I was going over and over the I felt that the voice didn't have enough emphasis, I wanted to give it an echoing effect. I decided to add a Reverb I altered the settings a little to get a better effect it. I think the effect worked well alongside the visuals I dropped the deci bells to make it slightly quieter but still loud enough to hear over the backing track. I feel it gives the right emphasis, and something I would hear in a cinematic trailer. the fusion between the visuals and the audio really works.
Subscribe to:
Comments (Atom)